 Save
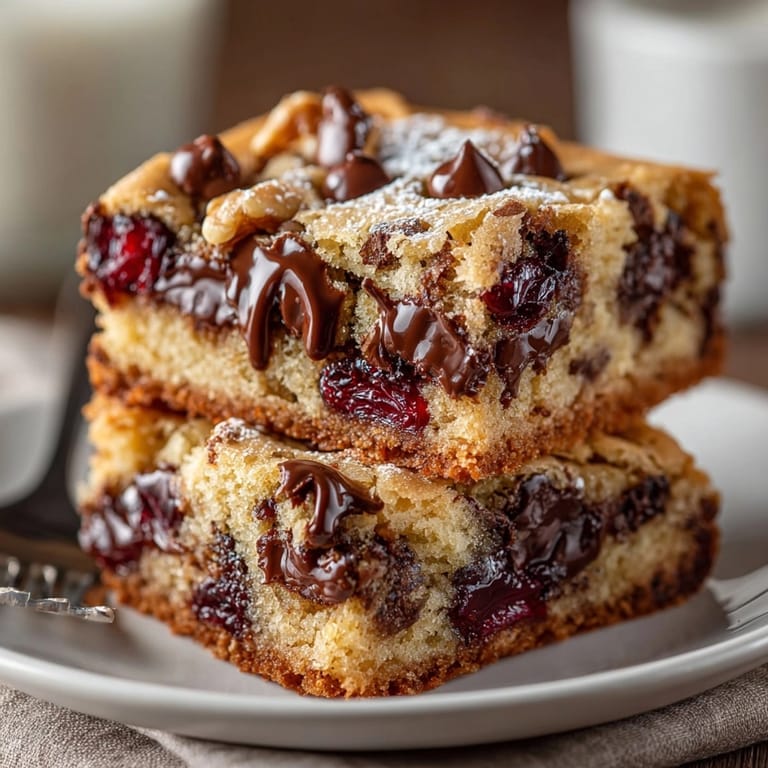
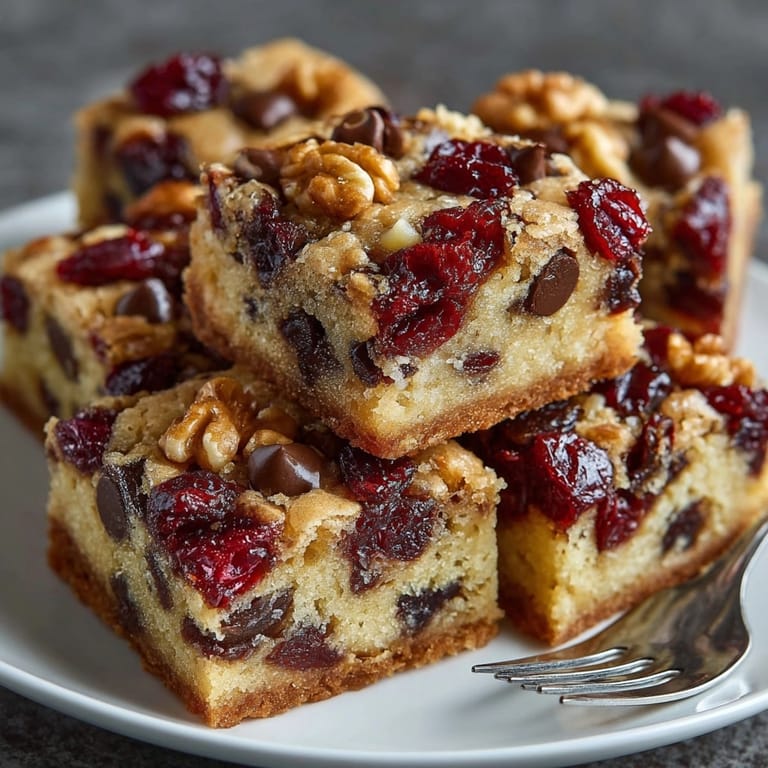
Save This classic American cookie bar recipe transforms the beloved chocolate chip cookie into an easy-to-make treat with the perfect balance of sweet and tart flavors. The addition of dried cherries creates delightful bursts of tangy flavor that beautifully complement the rich chocolate chips throughout these buttery, chewy bars.
I first created these bars when hosting a last-minute neighborhood gathering. When everyone requested the recipe before leaving, I knew I'd stumbled upon something special. Now they're my signature contribution to every potluck and bake sale.
Ingredients
- All purpose flour: forms the sturdy base for these bars ensuring the perfect chewy texture
- Baking soda: provides just the right amount of lift without making them cakey
- Fine sea salt: enhances all the flavors especially the chocolate use kosher salt in a pinch
- Unsalted butter: creates that rich cookie flavor make sure it's truly softened for proper creaming
- Light brown sugar: adds moisture and a subtle molasses note dark brown works too for deeper flavor
- Granulated sugar: balances the brown sugar and helps create those slightly crisp edges
- Large eggs: at room temperature bind everything together cold eggs will prevent proper mixing
- Pure vanilla extract: adds warmth and depth artificial versions simply cannot compare
- Semisweet chocolate chips: provide classic chocolate flavor chunks work beautifully too
- Dried tart cherries: offer bright pops of flavor that balance the sweetness choose plump ones
- Optional nuts: add wonderful texture and complexity toast them first for enhanced flavor
Tired of Takeout? 🥡
Get 10 meals you can make faster than delivery arrives. Seriously.
One email. No spam. Unsubscribe anytime.
Instructions
- Prepare Your Pan:
- First preheat your oven to 350°F and line your 9x13 pan with parchment paper leaving overhang on the sides. This step is crucial as it allows you to lift the entire slab of cookie bars out easily after baking for clean cutting. The parchment prevents any sticking and makes cleanup significantly easier.
- Mix Dry Ingredients:
- In a medium bowl whisk together the flour baking soda and salt until thoroughly combined. This even distribution ensures no bitter spots from the baking soda. The salt is particularly important as it will balance the sweetness and enhance the chocolate flavor throughout the bars.
- Cream The Butter And Sugars:
- Using an electric mixer or strong arm power beat the softened butter with both sugars for a full 2 minutes until the mixture becomes noticeably lighter in color and fluffy in texture. This incorporates air into the batter creating the foundation for the perfect chewy texture. If your butter is not properly softened this step will not work correctly.
- Add Wet Ingredients:
- Add eggs one at a time beating for about 30 seconds after each addition until fully incorporated. Then mix in the vanilla extract. The eggs provide structure while the vanilla adds that warm aromatic quality that makes homemade baked goods so irresistible.
- Combine Wet And Dry:
- Add the flour mixture to your butter mixture gradually mixing on low speed just until no dry streaks remain. Overmixing at this stage will develop too much gluten resulting in tough rather than tender bars. Stop mixing the moment the flour disappears.
- Fold In AddIns:
- Using a spatula gently fold in the chocolate chips dried cherries and nuts if using. This gentle folding preserves the air you incorporated earlier. Make sure the addins are evenly distributed throughout the dough for consistent flavor in every bite.
- Spread In Pan:
- Transfer the dough to your prepared pan and spread it evenly using an offset spatula or the back of a spoon. Pay special attention to pushing the dough into the corners and creating a level surface for even baking. The dough will be thick and slightly sticky.
- Bake To Perfection:
- Place the pan in your preheated oven and bake for 22 to 25 minutes. Look for golden brown edges while the center should appear just set but still slightly soft. Remember that the residual heat will continue cooking the bars after removal from the oven.
- Cool Completely:
- Allow the bars to cool completely in the pan placed on a wire rack. This cooling period is essential as it allows the bars to set up properly. Cutting too early will result in messy edges and an underdeveloped texture. Patience here is rewarded with perfect bars.
 Save
Save The tartness of the cherries was a happy accident in my kitchen. I was out of chocolate chips and only had half the amount needed, so I rummaged through my pantry and found dried cherries. That improvisation turned into my most requested recipe, proving that sometimes kitchen emergencies lead to the best creations.
The Secret To Perfect Texture
The key to achieving that ideal chewy texture lies in three critical factors. First, don't overmix the dough once you add the flour—this develops gluten which can make your bars tough rather than tender. Second, make sure your butter is truly softened but not melted—proper creaming creates tiny air pockets that give the bars structure. Finally, the baking time matters tremendously. Even just two minutes can make the difference between perfectly chewy bars and ones that are too dry. When in doubt, slightly underbake them as they'll continue cooking from residual heat after removal from the oven.
Make-Ahead Options
These cookie bars are perfect for planning ahead. You can prepare the dough up to 3 days in advance and store it covered in the refrigerator. When ready to bake, let the dough sit at room temperature for about 30 minutes to soften slightly before spreading in your pan. For longer storage, the unbaked dough freezes beautifully for up to 3 months. The baked bars themselves can be frozen too—wrap individual portions tightly in plastic wrap and then aluminum foil. To serve, thaw at room temperature for about an hour. These make-ahead capabilities make these bars perfect for busy holidays or unexpected guests.
Seasonal Variations
- Winter Holiday Version:
- Replace half the cherries with dried cranberries and add 1 teaspoon of orange zest
- Add warming spices:
- Add 1/4 teaspoon of cinnamon and a pinch of nutmeg for warming winter spices
- Festive appearance:
- Drizzle with white chocolate after cooling for a festive appearance
- Summer Picnic Adaptation:
- Use dried blueberries instead of cherries for a summery twist
- Tropical flair:
- Add 1/2 cup of toasted coconut flakes for tropical flair
- Refreshing treat:
- Serve chilled for a refreshing summer dessert option
Serving Suggestions
Transform these humble bars into an elegant dessert by warming them slightly and topping with a scoop of vanilla bean ice cream. The contrast between the warm, chewy bar and cold, creamy ice cream creates an irresistible textural experience. For a coffee shop experience at home, serve with a cappuccino or latte—the slight bitterness of coffee perfectly complements the sweet-tart flavor profile of these bars. They also make excellent lunchbox treats or after-school snacks when cut into smaller portions. For gifting, stack them in a decorative tin separated by parchment paper for a homemade present that's always appreciated.
 Save
Save The quality of your vanilla makes a noticeable difference in these bars—splurge on pure vanilla extract rather than artificial flavoring. When incorporating the dried cherries, chop them if they're particularly large to ensure even distribution throughout the bars.
Recipe FAQs
- → Can I substitute dried cherries with another fruit?
Yes, dried cranberries or blueberries work great. Adjust quantity to match your taste preference.
- → What type of chocolate chips is best?
Semi-sweet chips offer a classic balance, but milk, dark, or white chocolate can be substituted for variety.
- → How do I ensure the bars stay chewy?
Bake until just set in the center, usually 22 minutes. Overbaking leads to a firmer texture.
- → Are nuts necessary in the mix?
Nuts are optional. Walnuts or pecans add crunch, but you can omit them for a nut-free version.
- → What tools make preparation easier?
A 9x13-inch pan, parchment paper, mixing bowls, and an electric mixer streamline your preparation.