 Save
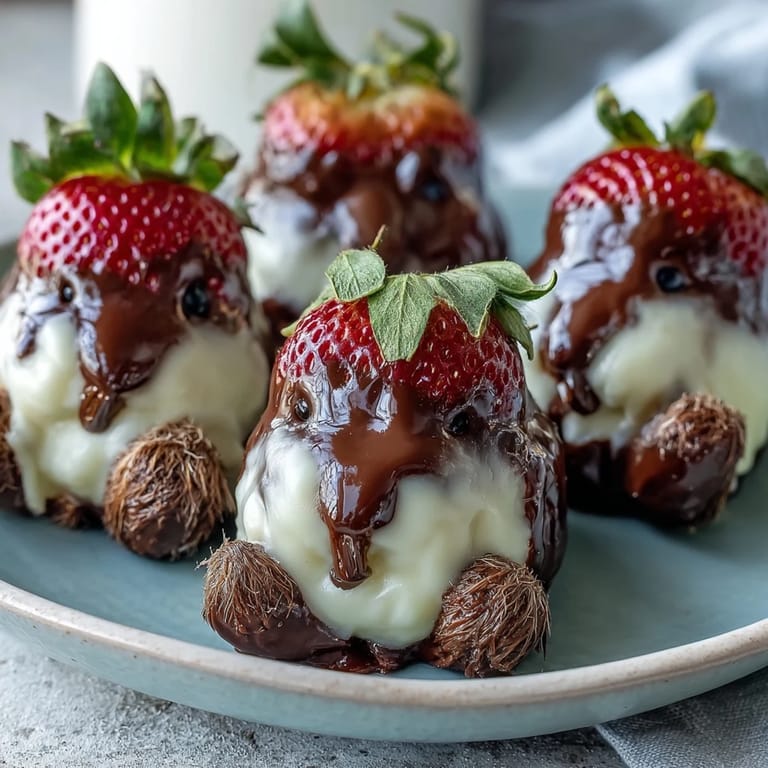
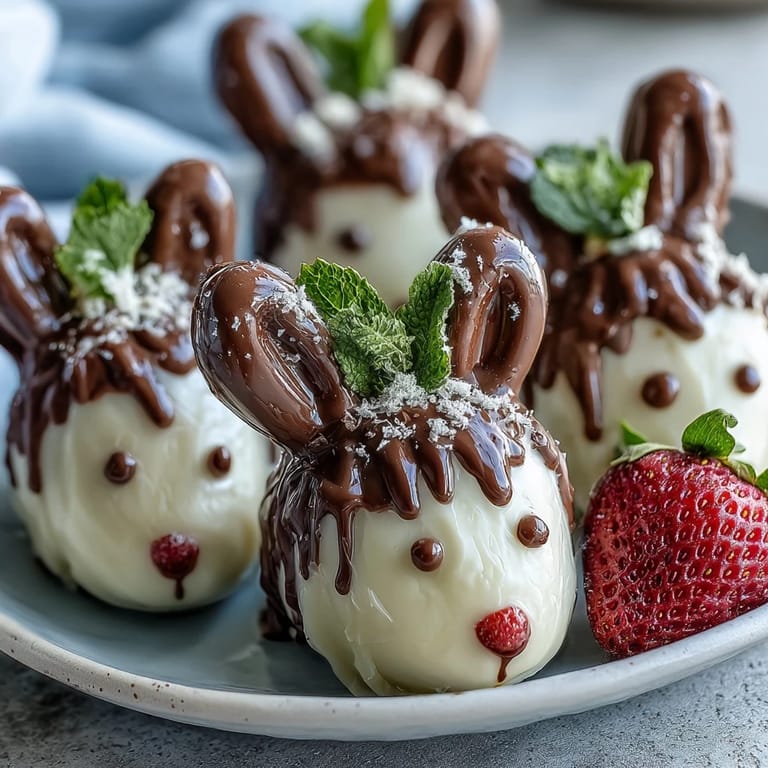
Save My daughter came home from school with bunny-shaped paper cutouts and big Easter plans, so I raided the kitchen for something that would make her eyes light up. Strawberries dipped in white chocolate felt like pure magic, the kind of simple idea that transforms ordinary fruit into something worthy of celebration. When I added marshmallow ears and tiny candy eyes, she gasped before I'd even finished the first one. These little chocolate-drizzled bunnies became the star of our Easter table, and honestly, they taste as delightful as they look.
Last Easter, I made a double batch because I thought my family would devour them, but what actually happened was we started taking photos instead of eating. My sister held one up to the light, admiring how the white chocolate gleamed, and suddenly everyone was posing these tiny bunnies like they were the guests of honor. By the time we actually sat down, they'd warmed up slightly and tasted even better than when they were cold.
Ingredients
- Large fresh strawberries: Choose ones that are firm and similar in size so they look like a matching bunny family, and make sure to dry them completely after washing or the chocolate won't stick properly.
- White chocolate: Chop it finely before melting so it melts evenly and stays smooth, and don't let it get too hot or it'll become thick and grainy.
- Dark chocolate: Use this for the drizzle and whiskers to add a little sophisticated contrast against the sweet white coating.
- Mini marshmallows: These become adorable ears when you cut them in half, and they stick beautifully to the soft chocolate before it sets.
- Edible pink food gel or pink candy melts: A tiny dot on each ear and nose brings these bunnies to life with personality and charm.
- Candy eyes or mini chocolate chips: These are what make them bunnies instead of just coated strawberries, so don't skip this step even if you have to improvise.
Tired of Takeout? 🥡
Get 10 meals you can make faster than delivery arrives. Seriously.
One email. No spam. Unsubscribe anytime.
Instructions
- Prep your strawberries and workspace:
- Line a baking sheet with parchment paper and wash your strawberries thoroughly, then pat them completely dry with paper towels. Dry strawberries are crucial because moisture will make the chocolate slide right off.
- Melt the white chocolate:
- Use a double boiler setup by placing a heatproof bowl over simmering water, or microwave in short 30-second bursts if that feels easier. Stir between each burst and stop as soon as it's smooth and glossy, before it gets too hot.
- Dip and coat:
- Hold each strawberry by the leafy stem end and dunk it into the melted white chocolate, twisting gently so it's fully covered. Place each one on your parchment-lined sheet and work quickly while the chocolate is still soft.
- Add marshmallow ears:
- Cut your mini marshmallows in half lengthwise and press two halves gently into the top of each strawberry before the chocolate hardens. The warmth of the chocolate will help them stick, so don't wait too long between dipping and decorating.
- Paint on the pink details:
- Use a toothpick to dab a tiny bit of pink food gel into the center of each marshmallow ear to create an inner ear, and add a small dot for the nose. The toothpick is your best friend here for precision without getting your fingers messy.
- Give them eyes:
- Place a candy eye or mini chocolate chip on each bunny to bring them to life. Press gently so they stay put, and step back to admire how your bunnies are coming together.
- Drizzle the dark chocolate:
- Melt your dark chocolate and transfer it to a piping bag or even a small plastic bag with a corner snipped off. Drizzle over the top of each bunny or pipe on little whiskers and mouths for extra character.
- Chill and serve:
- Refrigerate for 10 to 15 minutes so everything sets properly and holds its shape. They taste best served chilled, right when the chocolate has set but the strawberry inside is still fresh and juicy.
 Save
Save There's something quietly special about making a recipe that exists purely for joy, with no pretense or complicated technique. These bunnies remind me that the most memorable treats are often the ones that make people smile before they ever take a bite, and that's worth the small effort it takes to bring them together.
Choosing Your Strawberries Wisely
I learned the hard way that one oversized strawberry will throw off the whole aesthetic of your bunny family, so hunt for ones that are uniform in size and shape. Slightly conical strawberries work better than round ones because the pointed tip naturally angles toward the back where the tail would be, giving each bunny a more intentional appearance. Store them in a cool spot right up until you're ready to work with them so they stay perky and don't get soft or weepy.
Mastering the Chocolate Coating
The double boiler method feels more intimidating than it actually is, and once you've done it a couple times it becomes second nature. If you see your white chocolate looking thick and dull instead of smooth and shiny, that means it's begun to seize, which happens when heat or moisture gets involved, so stop immediately and start fresh rather than trying to rescue it. A little vegetable oil or cocoa butter stirred into seized chocolate can sometimes help, but prevention is truly easier than the cure.
Decoration Ideas Beyond the Basics
Once you master the basic bunny, you'll start seeing endless possibilities for customization that make each batch feel fresh. Use edible pearls or metallic dust for a fancy version, or swap the candy eyes for tiny heart shapes cut from pink fondant if you're feeling creative. A light dusting of colored sugar on the white chocolate before it sets also gives these bunnies a festive sparkle that catches the light beautifully.
- Let your creativity shine by experimenting with different colored chocolates or adding tiny sprinkles before the coating hardens.
- Make batches ahead of time and store them in the refrigerator for up to three days so you're not stressed on party day.
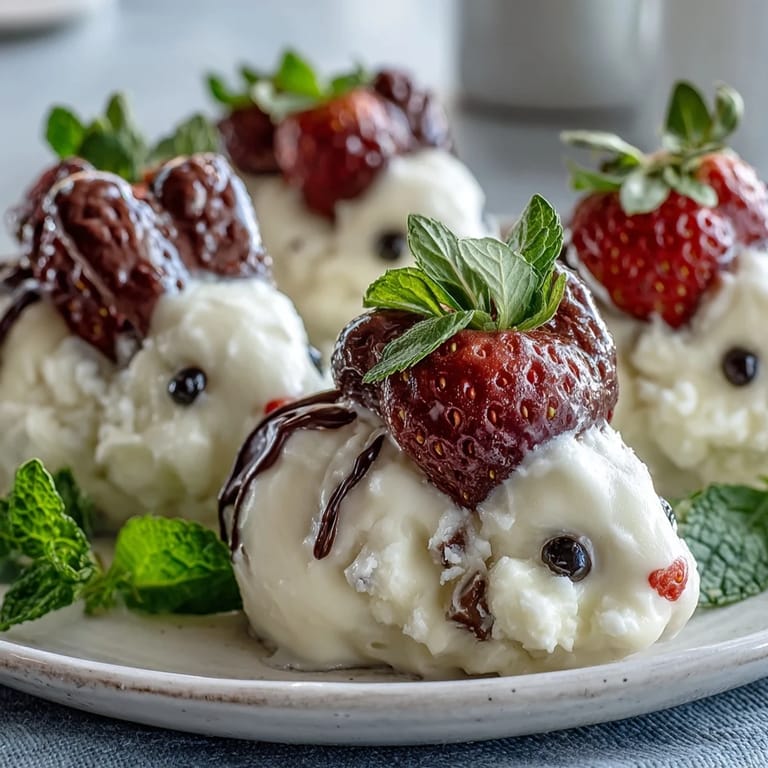
- Take photos in natural light because the glossy chocolate and white coating make these bunnies impossibly photogenic and Instagram-worthy.
 Save
Save These little strawberry bunnies prove that simple ingredients and a dash of playfulness can create something genuinely magical. Make them for yourself just as much as you make them to share, and enjoy every sticky, chocolatey moment of the process.
Recipe FAQs
- → How do I melt the chocolate without burning it?
Use a double boiler by placing a heatproof bowl over simmering water, stirring frequently. Alternatively, microwave in short 30-second bursts, stirring between intervals to prevent burning.
- → Can I replace marshmallows for the ears?
Yes, mini marshmallows work best for shaping ears, but you can use colored sprinkles or edible pearls for alternative decorations.
- → What is the best way to attach candy eyes securely?
Attach candy eyes or mini chocolate chips while the white chocolate coating is still soft to ensure they stick firmly.
- → How long should I chill the coated strawberries?
Refrigerate for 10–15 minutes until the chocolate is completely set and firm before serving.
- → Can I make these treats vegan-friendly?
Yes, choose dairy-free chocolate and vegan marshmallows to accommodate a vegan diet without compromising the appearance or taste.