 Save
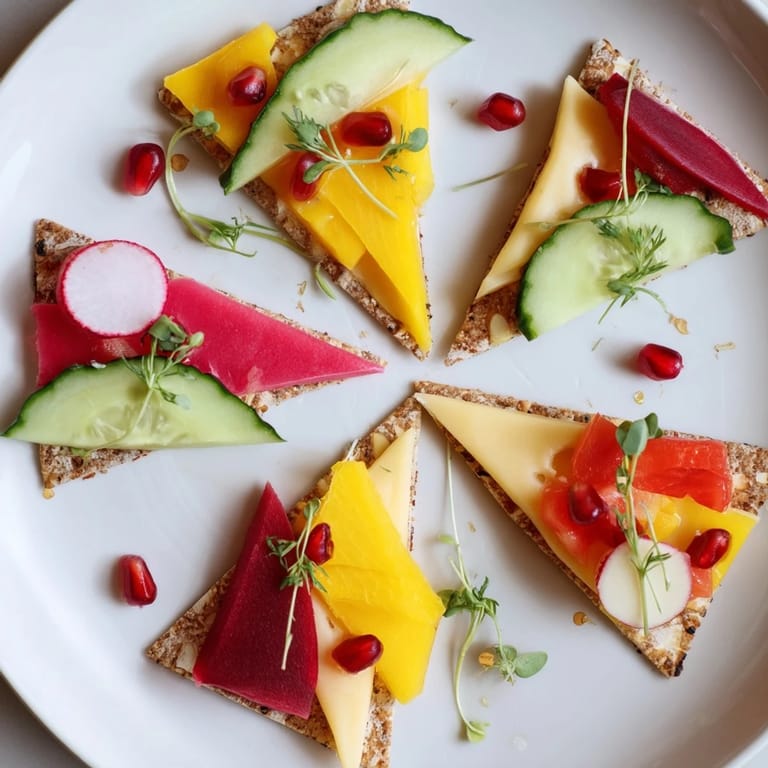
Save I discovered the tessellation triangle concept while flipping through a design magazine at a friend's kitchen table, completely mesmerized by a photograph of geometric patterns. That evening, inspired and a bit ambitious, I decided to recreate the concept with food. I spent hours carefully cutting triangles from colorful vegetables and cheeses, methodically fitting them together like a puzzle. When I stepped back and saw the finished board glowing with reds, yellows, oranges, and pale golds all interlocking perfectly, I realized I'd created something that was as much art as it was appetizer. My guests actually paused before eating, asking if they were allowed to disturb the arrangement. That moment changed how I thought about plating.
I made this for my sister's engagement party, and watching her face light up when she saw the tessellation board made all those careful cuts worth every second. She kept saying it was too beautiful to eat, but of course everyone did, and the combination of textures and flavors turned out to be just as stunning as the presentation. That night, I realized that food that looks like this tastes better somehow, or maybe we just eat it more mindfully.
Ingredients
- Aged Manchego (100g): This Spanish cheese has a firm texture that slices cleanly without crumbling, and its slightly nutty flavor adds sophistication. Chill it for at least 30 minutes before cutting so it doesn't crack.
- Sharp White Cheddar (100g): The sharpness cuts through richer elements and its pale color creates beautiful contrast. Its structural integrity when cold makes it perfect for geometric cuts.
- Creamy Havarti (100g): This Danish cheese brings a buttery smoothness that balances the sharpness of the cheddar. It's forgiving to cut and adds visual warmth to your pattern.
- Cucumber (1 medium): Choose one that's firm and not watery. It brings refreshing crispness and its pale green is essential for the tessellation palette.
- Watermelon Radish (1 medium): The stunning pink and white interior is what makes this special. Peel it carefully to reveal the geometric striping naturally present in the vegetable.
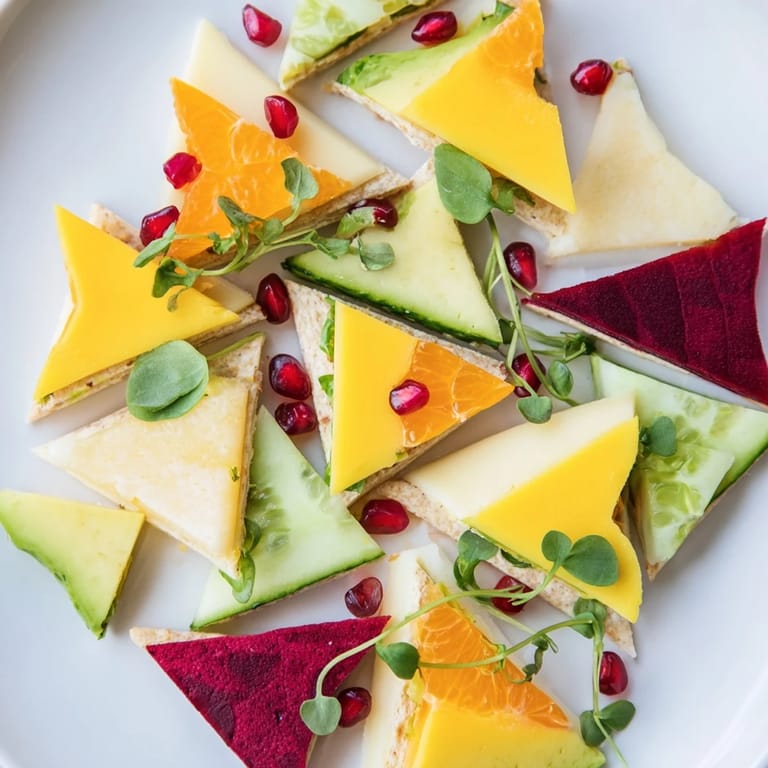
- Mango (1 ripe): Select one that yields slightly to pressure but isn't mushy. The golden-orange hue is crucial to your color scheme, and the sweetness provides an unexpected delight.
- Red Bell Pepper (1 large): The glossy red adds vibrancy and sweetness. Choose one with flat sides for easier cutting.
- Avocado (1 small, firm): This is crucial—use one that's just ripe, not soft. If it's too ripe, it won't hold its triangle shape. The pale green is essential to your palette.
- Cooked Beet (1 small): Pre-cooked and peeled beets from the grocery store work beautifully here. The deep magenta adds depth and earthiness to your geometric arrangement.
- Gluten-Free Crackers or Lavash (6 large): These act as the base triangles that anchor your pattern. They're functional and visual.
- Fresh Microgreens (2 tablespoons): Choose varieties with vibrant green color. They add subtle peppery flavor and fill small gaps in your pattern.
- Pomegranate Arils (2 tablespoons): These jewel-like seeds add bursts of tart sweetness and gorgeous ruby color. They're the garnish that makes people gasp.
- Honey or Fig Jam (2 tablespoons, optional): A drizzle adds unexpected sweetness and creates visual pockets of richness across the board.
- Flaky Sea Salt: Use this for finishing—it should taste like the ocean, not bitter. The flakes catch light beautifully on the finished board.
- Freshly Cracked Black Pepper: Grind it fresh right before serving so you get the full aromatic benefit.
Tired of Takeout? 🥡
Get 10 meals you can make faster than delivery arrives. Seriously.
One email. No spam. Unsubscribe anytime.
Instructions
- Prepare Your Workspace:
- Clear a large cutting board or work surface and place a damp towel underneath to keep everything stable. You need your board absolutely still—any movement ruins precision. Gather every tool you'll need before starting: sharp knives, your ruler or triangle cutter, peeler, and all your ingredients arranged in order. This might feel obsessive, but it genuinely changes everything. You're about to create geometric art, and artists don't improvise their materials.
- Chill Everything Thoroughly:
- Place all cheeses, vegetables, and fruit in the refrigerator for at least 30 minutes. Cold ingredients slice cleanly and hold their shape better. This step feels like it wastes time, but it's actually the secret ingredient. Cold mango won't bruise when you cut it. Cold cheese won't shred. Cold avocado won't oxidize as quickly.
- Cut Your First Triangle Template:
- If you're using a cookie cutter, skip this step. If you're cutting by hand, use your ruler and chef's knife to create one perfect equilateral triangle with 5 cm (2 inch) sides on a scrap of paper or cardboard. This becomes your visual guide for every single cut. Hold it up against your first ingredient slice and cut along the outline. Yes, you're going to do this for dozens of pieces. The payoff is worth it.
- Slice All Ingredients Into Even Planks:
- Using your sharpest knife, slice each ingredient into 5 mm (1/4 inch) thick slabs. Work slowly and deliberately. You'll feel when the knife is cutting smoothly through a properly chilled cucumber versus one that's slightly soft—trust that feedback. As you slice, place finished planks on separate small plates to keep flavors from mingling.
- Cut Triangles From Each Ingredient:
- Working with one ingredient at a time, place each plank on your cutting board and carefully cut equilateral triangles. This is where patience becomes your greatest tool. A rushed triangle is a broken triangle. You should end up with roughly 6 to 8 triangles per ingredient, depending on size and waste. Stack matching triangles together and return them to the refrigerator if your kitchen is warm.
- Prepare Your Serving Surface:
- Choose a platter, wooden board, or white ceramic surface that will serve as your canvas. The color of your serving surface matters—a light background makes colors pop, while a dark surface creates drama. Wipe it clean and make sure it's completely dry.
- Begin Your Tessellation at a Corner:
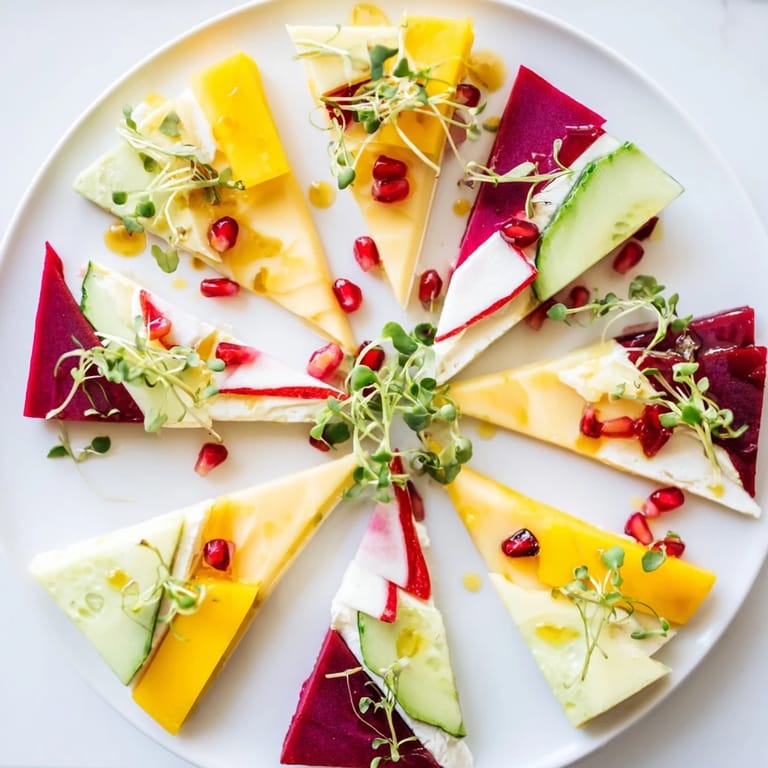
- Start at one corner of your platter and begin laying triangles, point-first, overlapping them like roof shingles. This is where the magic happens—you're not just arranging ingredients, you're creating a pattern. Think about color flow: don't clump all the reds together. Alternate pale cheese with vibrant vegetables. Let the eye travel across the board in a journey.
- Interlock Your Pieces Tightly:
- As you add each triangle, nestle it firmly against its neighbors. There should be virtually no gaps. If a piece doesn't fit, adjust the neighbors slightly rather than forcing it. You'll feel when the fit is right—it's snug but not strained. This is the moment when your board transforms from a collection of pieces into a unified whole.
- Add Your Cracker Triangles:
- Trim your crackers or lavash into matching triangles and place them strategically throughout your pattern. They anchor the design and give guests something to actually eat the delicate items with. Position them where they feel natural to the flow of your pattern, not as an afterthought.
- Scatter Your Microgreens and Pomegranate Arils:
- Gently nestle microgreens and pomegranate arils into the natural crevices and gaps in your pattern. Let them follow the lines of your tessellation rather than covering it randomly. These final garnishes should look deliberate, not accidental.
- Add Your Finishing Drizzle:
- If you're using honey or fig jam, apply it in small, deliberate dots or thin drizzles across the board. Let it pool slightly in natural pockets. This adds visual interest and sweet surprise bites.
- Season With Purpose:
- Finish with a light, even sprinkling of flaky sea salt and freshly cracked black pepper. Don't over-salt—you want to enhance, not overwhelm. The seasoning should be visible but refined, like the final detail on a painting.
 Save
Save There's a moment right before guests arrive when I step back and look at the finished tessellation board, and I'm always struck by how much beauty lives in precision. This dish isn't just about feeding people—it's about showing them that you cared enough to spend time creating something that matters. That care is tasted in every bite.
The secret to a stunning tessellation board is thinking about color like a painter thinks about a canvas. You want warm and cool tones distributed evenly so your eye never lands on a clump of similar colors. The pale greens and creams should float throughout, creating visual breathing room, while the deep magentas and bright reds provide anchor points that draw the eye across the entire board. When you're cutting your triangles, keep mental notes about which pieces you'll place where. This sounds complicated, but it becomes intuitive after you've placed about twenty pieces. Let the colors speak to each other.
There's genuine psychology in how tessellation affects how people approach a board. Because everything is precisely organized into triangles, guests feel almost reverential about it at first. They take their time selecting pieces rather than grabbing randomly. This slower, more deliberate eating actually means people taste the ingredients better and enjoy the experience more deeply. The structure creates mindfulness without anyone realizing it's happening. That's the real gift of this presentation.
While the core concept thrives on precision, your ingredient choices are completely yours. Think about what creates the best color and texture story for your kitchen, your season, and your guests. Spring might call for peas, asparagus, and pale cheeses. Fall might lean toward roasted sweet potato, figs, and aged goudas. The tessellation concept remains perfect regardless of what fills it.
- For a protein boost, add thin triangles of cured meats like prosciutto or salami—they drape beautifully and add richness
- Include soft elements like herbed goat cheese or labneh spread thinly on cracker triangles for textural contrast
- Try roasted vegetables like beets, carrots, or zucchini if you want to add cooked elements alongside the fresh ones
 Save
Save Every time I make a tessellation triangle board, I'm reminded that food doesn't have to choose between being beautiful and being delicious. This one is proof that when you slow down and pay attention to detail, you create something that feeds both the eye and the belly. That's the kind of cooking that stays with people.
Recipe FAQs
- → How do I achieve perfect triangle cuts?
Use a sharp chef's or paring knife along with a metal ruler or triangle cookie cutter. Chill ingredients beforehand for cleaner, firmer slices ensuring uniform 5 cm equilateral triangles.
- → What is the best way to assemble the tessellation pattern?
Arrange triangles tightly edge-to-edge on a flat board, alternating colors and textures to create a seamless mosaic without gaps for optimal visual impact.
- → Can I substitute the cheeses or fruits?
Yes, swap in other firm cheeses like gouda or feta and fruits such as kiwi or pineapple to suit your taste while maintaining similar textures for cutting.
- → How should I store the platter if not serving immediately?
Cover tightly and refrigerate for up to 2 hours. Avoid freezing and keep perishable items chilled until serving to preserve freshness and texture.
- → What garnishes enhance the flavor and presentation?
Sprinkle fresh microgreens and pomegranate arils among triangles and drizzle honey or fig jam lightly. Finish with flaky sea salt and freshly cracked black pepper for balance.