 Save
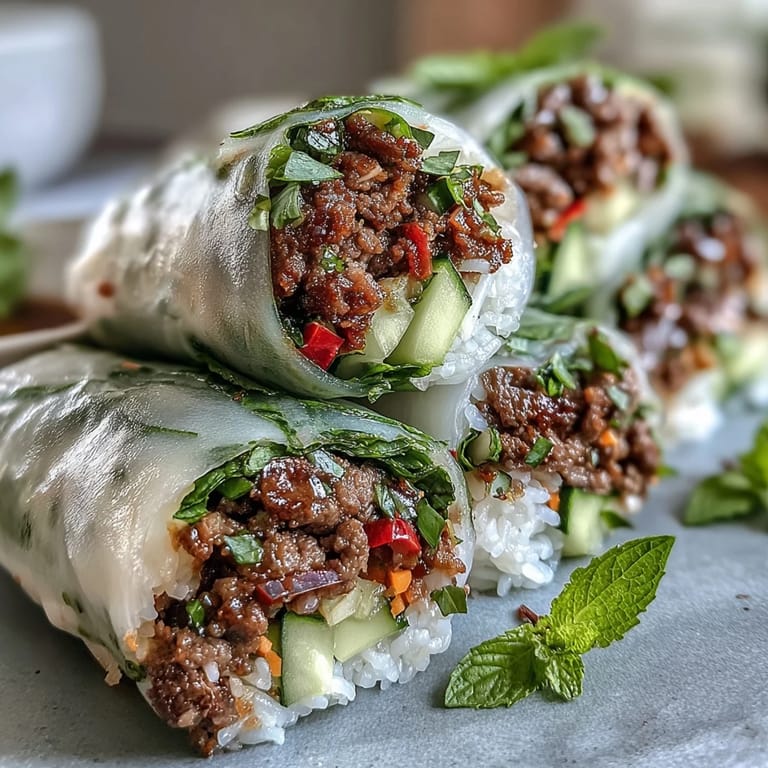
Save The first time I made these, I'd invited friends over on a whim and promised something "fresh and different." By the time I was pan-frying the beef with garlic and chilies, my tiny kitchen smelled like a street stall in Bangkok—neighbors actually knocked to ask what I was cooking. That aroma alone convinced me this dish was worth mastering, and watching everyone's eyes light up when they took that first crispy, herb-filled bite sealed the deal.
Last summer, my sister came over stressed from work, and I put her to work at the rolling station. We talked and laughed for an hour, our fingers sticky with rice paper and herbs, and by the time we sat down to eat, she'd forgotten everything that was bothering her. Food has a way of doing that—especially when you make it together.
Ingredients
- 1 lb ground beef (85–90% lean): Ground turkey or chicken work beautifully here too, but the beef's richness stands up perfectly to the bold Thai flavors
- 1 tbsp neutral oil: Peanut oil adds a subtle nutty flavor that complements Asian dishes, but canola or vegetable oil are perfectly fine alternatives
- 3 cloves garlic, minced: Fresh garlic is non-negotiable here—jarred minced garlic lacks the aromatic punch that makes this filling sing
- 1 small shallot, finely minced: Shallots have a sweeter, more delicate flavor than onions, but a quarter of a red onion works in a pinch
- 2 Thai birds eye chilies, minced: These pack serious heat—remove the seeds if you're sensitive, or use red pepper flakes for a milder alternative
- 1 small red bell pepper, finely diced: Adds sweetness and a bright pop of color that makes the filling visually gorgeous
- 3 green onions, thinly sliced: Separate the white and green parts—whites go in the beef for flavor, greens are added at the end for freshness
- 1 cup fresh Thai basil leaves, roughly chopped: Thai basil has a distinct anise-like flavor, but Italian basil works if you can't find it—just add a pinch of anise seed
- 1 tbsp fresh lime juice: Added at the end to brighten everything up, just like a squeeze of lemon finishes a soup
- 1 ½ tbsp soy sauce: Use tamari or coconut aminos if you need this gluten-free
- 1 tbsp fish sauce: Don't be intimidated—it's the salt of Southeast Asian cooking and adds deep umami you can't get anywhere else
- ½ tbsp oyster sauce: Creates that glossy, restaurant-quality coating on the beef—look for a gluten-free version if needed
- 1 tsp dark soy sauce: Optional, but gives the beef that rich, caramel color that makes it look professional
- 2–3 tsp brown sugar or palm sugar: Balances the salty and spicy elements—start with less and add more to taste
- 12–16 large rice paper wrappers: The 22cm size is ideal, but any large round wrappers will work—just don't buy the tiny spring roll wrappers
- 1 ½ cups cooked jasmine rice or vermicelli noodles: Optional, but adds heft and makes the rolls more filling—cool completely before using
- 1 cup each julienned cucumber and carrots, shredded lettuce: Prep these ahead and keep them cold—crisp vegetables are the secret to perfect rolls
- 1 cup each fresh cilantro, Thai basil, and mint leaves: This herb trio creates that unmistakably fresh Southeast Asian flavor profile
- For the dipping sauce (fish sauce, lime juice, sugar, water, garlic, chilies): Make this while the beef cools—it needs about 10 minutes for the flavors to meld
Tired of Takeout? 🥡
Get 10 meals you can make faster than delivery arrives. Seriously.
One email. No spam. Unsubscribe anytime.
Instructions
- Mix the sauce seasoning:
- Whisk together the soy sauce, fish sauce, oyster sauce, dark soy sauce if using, and sugar in a small bowl until the sugar completely dissolves. Add water a tablespoon at a time until you have a smooth, pourable consistency, then set it aside.
- Sizzle the aromatics:
- Heat the oil in a large skillet or wok over medium-high until it shimmers slightly. Add the garlic and shallot, stir-frying constantly for 30–45 seconds until they're fragrant and just beginning to turn golden.
- Build the flavor base:
- Toss in the minced chilies and the white parts of the green onions. Stir-fry for another 20–30 seconds, breathing in the spicy aroma—this is when your kitchen will start smelling amazing.
- Brown the beef:
- Add the ground beef, using your spatula to break it into small crumbles. Cook for 4–6 minutes, stirring frequently, until it's mostly browned with some crispy, caramelized spots.
- Soften the peppers:
- Stir in the diced red bell pepper and cook for 2–3 minutes. You want it softened but still with a little crunch—no mushy peppers here.
- Coat with sauce:
- Pour the sauce seasoning over the beef mixture and toss to coat everything evenly. Let it cook for 2–3 minutes more until the sauce reduces slightly and clings to the meat.
- Wilt the basil:
- Reduce the heat to low, add the chopped Thai basil and the green parts of the green onions, and toss gently. Cook for just 30–45 seconds until the basil wilts—you want it fragrant, not cooked to death.
- Finish with brightness:
- Turn off the heat and stir in the lime juice. Let the beef mixture cool completely while you prep everything else—warm filling makes soggy rolls.
- Whisk together the dipping sauce:
- In a small bowl, combine the fish sauce, lime juice, sugar, and warm water, stirring until the sugar dissolves. Add the garlic, chilies, shredded carrot, and herbs, then taste—it should be a perfect balance of salty, sour, sweet, and spicy.
- Set up your rolling station:
- Fill a large shallow dish with warm water—not hot, or the wrappers will get too soft too fast. Lay out all your prepped vegetables, herbs, and cooled beef filling within arm's reach.
- Soften the rice paper:
- Dip one wrapper in the warm water for 3–5 seconds, rotating it to moisten evenly. Place it on your cutting board—it'll still feel slightly stiff but will continue to soften as you work.
- Layer your fillings:
- Arrange 2–3 tablespoons of rice or noodles on the bottom third of the wrapper. Top with a generous spoonful of beef, then add strips of cucumber and carrot, a small handful of lettuce, and a few leaves of each herb.
- Roll it up:
- Fold the bottom edge over the filling, tuck in the sides like a burrito, then roll tightly away from you. Don't worry if your first few look messy—they'll still taste incredible, and you'll get the hang of it quickly.
- Repeat and serve:
- Keep rolling until you've used all the filling, placing each finished roll seam-side down on a plate. Serve them whole or slice diagonally for a pretty presentation, with the dipping sauce on the side.
 Save
Save These rolls have become my go-to for summer picnics and potlucks because they travel so beautifully. Last month, I brought a platter to a park gathering, and even the self-proclaimed picky eaters reached for seconds—the combination of textures and flavors just wins people over.
Making These Your Own
Once you've mastered the basic technique, these rolls are infinitely adaptable. I've made them with grilled shrimp, poached chicken, even crispy tofu for a vegetarian version that surprised me with how good it was. The key is keeping the filling well-seasoned and not overstuffing the wrappers—less is more when it comes to rolling.
The Art of Rice Paper
Rice paper can feel intimidating at first, but it's surprisingly forgiving once you understand its quirks. If a wrapper tears while you're working with it, just layer it with another piece—no one will notice once it's rolled. I keep a small bowl of water nearby to wet my fingertips, which prevents the paper from sticking to my hands.
Prep Like a Pro
The secret to stress-free rolling is having everything prepped before you begin. I lay out all my fillings in separate bowls, like my own little assembly line, and put on some music—it turns the process into something meditative rather than rushed. The beef filling can be made a day ahead and stored in the refrigerator, which means you can roll these in under 15 minutes when it's time to eat.
- Warm the dipping sauce slightly if you've chilled it—the flavors come alive when it's not ice-cold
- Cut rolls with a sharp knife and a gentle sawing motion to avoid squishing them
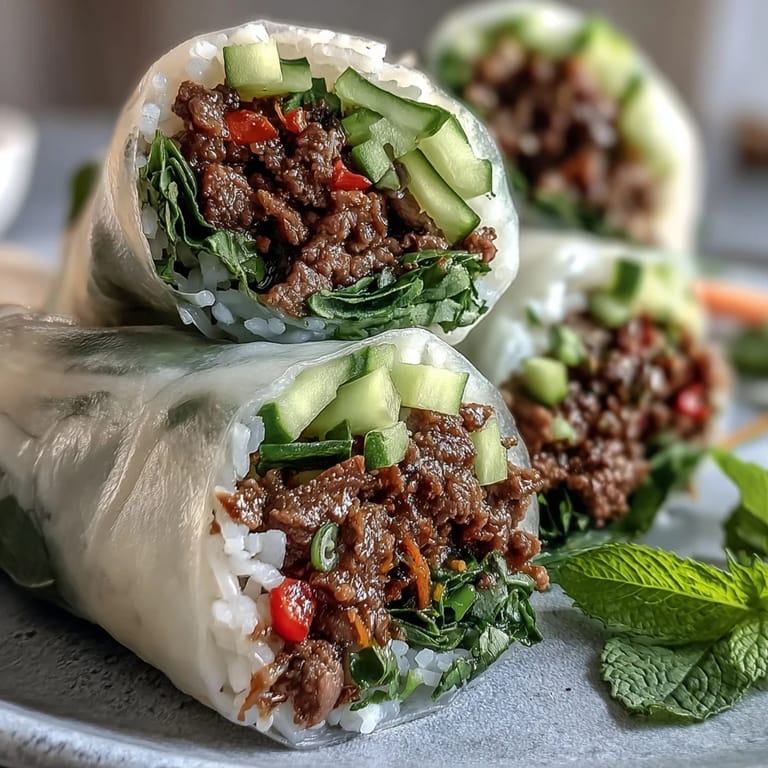
- If you're serving these to guests, consider slicing them in half so people can see the beautiful cross-section of colorful fillings
 Save
Save There's something joyful about eating food you've rolled with your own hands—it feels personal and nourishing in a way that takeout never can. I hope these rolls bring as much happiness to your table as they've brought to mine.
Recipe FAQs
- → How to prevent rice paper from tearing during rolling?
Dip each wrapper briefly in warm, not hot, water for 3-5 seconds. It will continue to soften on your work surface. Avoid over-soaking, which makes them sticky and prone to tearing.
- → Can I prepare the beef filling ahead of time?
Absolutely! The seasoned beef filling can be cooked and refrigerated for up to 2-3 days. Ensure it's cooled completely before storing and before assembling the rolls.
- → What are some good substitutions for Thai basil?
While Thai basil offers a unique peppery, anise-like flavor, you can substitute with a mix of Italian basil and a small amount of fresh mint or cilantro for a similar aromatic profile if Thai basil isn't available.
- → How can I make these rolls gluten-free?
To make them gluten-free, simply ensure you use gluten-free soy sauce (like tamari) and check that your oyster sauce is also certified gluten-free. The rice paper wrappers are naturally gluten-free.
- → How should I store leftover rolls?
These rolls are best enjoyed fresh. If you must store them, cover them tightly with plastic wrap or a damp paper towel and plastic wrap to prevent drying, and refrigerate for up to 2-3 hours. Bring to room temperature before serving.
- → Can I add other vegetables to the rolls?
Yes, feel free to customize! Thinly sliced red cabbage, bean sprouts, or thinly sliced radishes would add extra crunch and flavor dimension to your rolls.