 Save
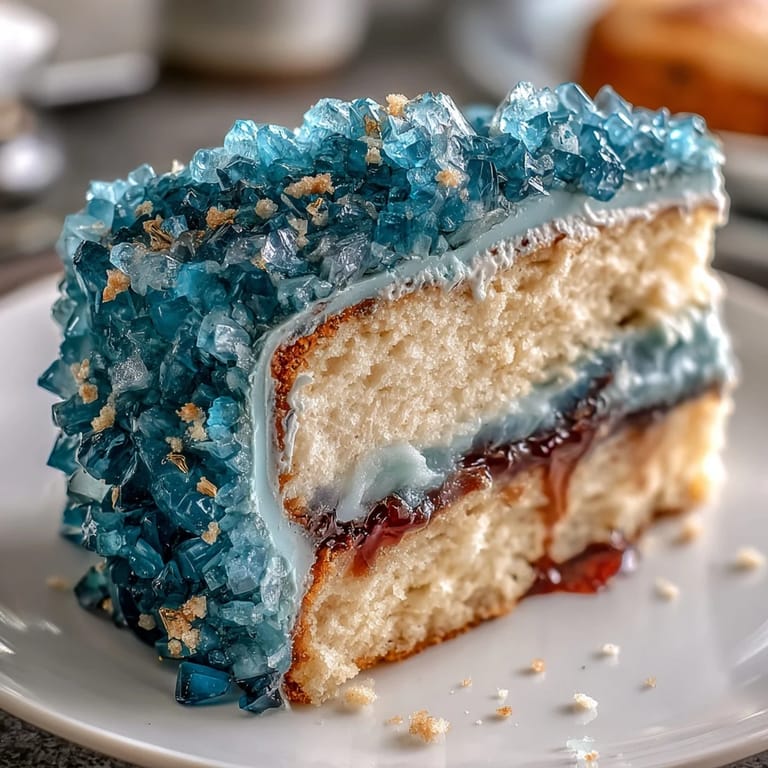
Save The first waft of vanilla cake baking that afternoon made me pause mid-decorating, just to enjoy the warm scent curling through my kitchen. For me, the teal and gold geode cake became less about perfection, and more about the creative, joyful chaos that comes with making something special for a big occasion. There was music playing, a bit of teal coloring splashed onto my apron, and the anticipation of graduation celebrations echoing in every step. I remember double-checking my edible gold leaf, hoping I wouldn’t end up gilding the countertop more than the cake. What I love most is that even the smallest slip-ups—an uneven edge here, a stray sugar crystal there—only made the cake more uniquely beautiful.
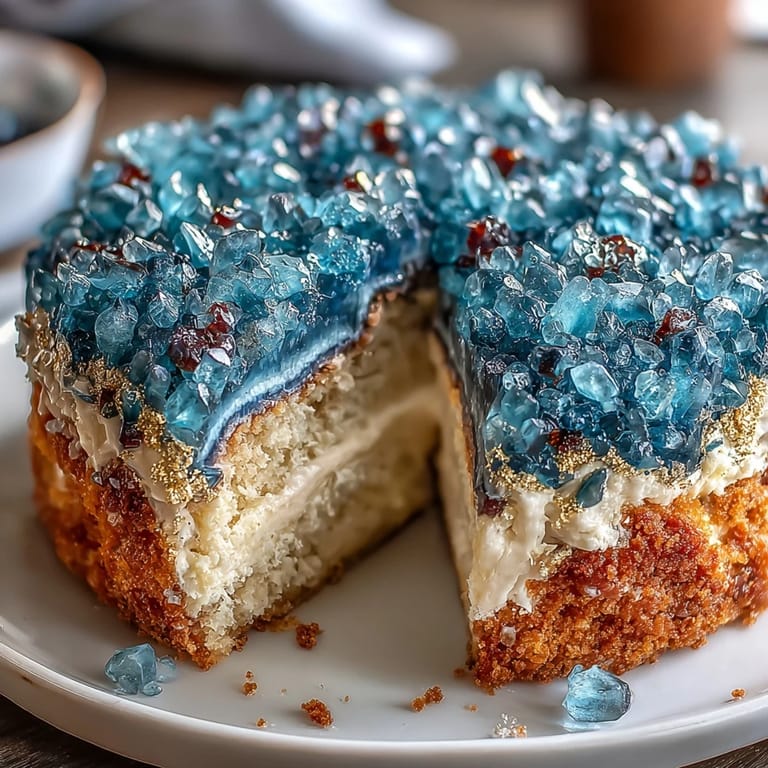
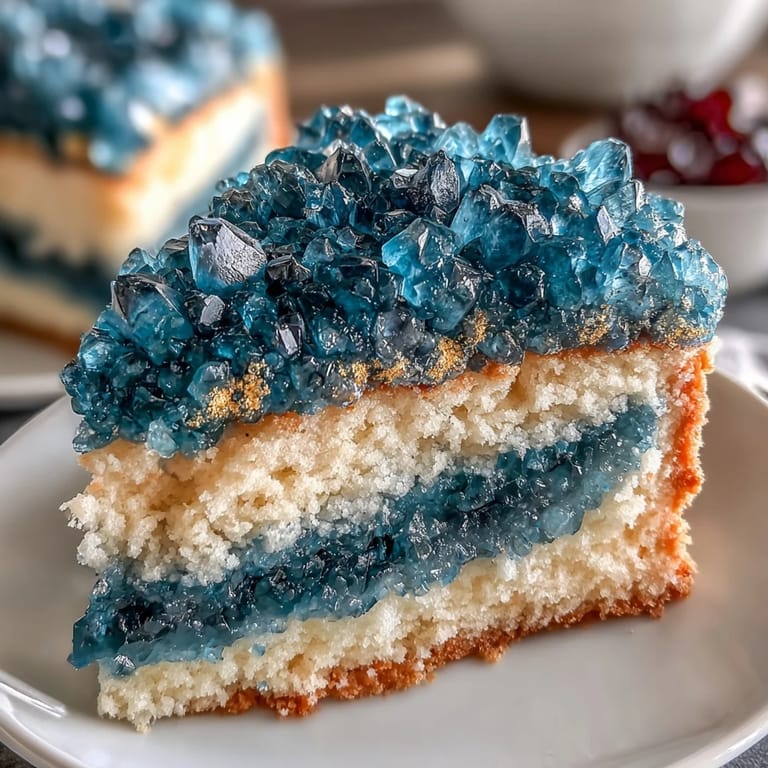
Last spring, my cousin brought her college friends over for a surprise graduation party, and this cake stole the show. We crowded around the kitchen island, peering at the gold glimmer and sugar crystal sparkle as I tried to explain how the geode design came together. Someone spilled lemonade, someone ate the leftover buttercream with a spoon, and someone snapped photos before the cake was even sliced. When it was finally cut, the inside shimmered teal and people cheered; it felt like a moment of pure, delicious celebration.
Ingredients
- All-purpose flour: Gives structure to the cake, and I always sift it to keep the crumb light.
- Baking powder: Ensures the cake rises evenly—measure carefully for a gentle lift.
- Salt: Balances sweetness and deepens flavor.
- Unsalted butter: Softened butter creates that irresistible, tender crumb—use high-quality for best taste.
- Granulated sugar: Sweetens and helps with creaming; I beat it until pale and fluffy for a perfect texture.
- Eggs: Room temperature eggs blend smoothly and keep the batter consistent.
- Vanilla extract: I use pure vanilla—it makes the cake fragrant and inviting.
- Whole milk: Adds richness and moisture; don't skimp, it makes all the difference.
- Powdered sugar: For a silky buttercream, always sift to avoid lumps.
- Heavy cream or milk: Adjusts the buttercream texture—add sparingly for the perfect spread.
- Teal gel food coloring: Gel gives vibrant color without thinning the buttercream or sugar crystals.
- Rock sugar crystals: The real secret to a dramatic geode—be gentle when mixing in color to preserve their shine.
- Edible gold leaf or gold luster dust: A brush of gold makes everything feel festive and magical.
- Simple syrup (optional): Brushing cake layers keeps them soft, especially if making ahead.
Tired of Takeout? 🥡
Get 10 meals you can make faster than delivery arrives. Seriously.
One email. No spam. Unsubscribe anytime.
Instructions
- Cake Batter Magic:
- Grease and line your pans, then whisk flour, baking powder, and salt until you hear the soft sift sound. Cream butter and sugar until the mixture turns pale and billowy; beat in eggs and vanilla, then gently alternate dry ingredients and milk, mixing until just smooth.
- Baking and Cooling:
- Divide batter between pans and bake at 350°F until the aroma fills the kitchen and a toothpick comes out clean. Let cakes cool briefly in the pans, then move to racks so they’re perfectly set for decorating.
- Building the Buttercream:
- Beat butter to creamy clouds, then add powdered sugar and vanilla while laughing at the powdered sugar haze. Add cream to get a silky consistency; tint most buttercream teal, saving some for crumb coating.
- Sugar Crystal Prep:
- Pour rock sugar into a bowl, adding drops of teal food coloring and gently folding until every crystal looks like a little gemstone. Lay the colored crystals to dry so they won’t melt away under the buttercream.
- Assembling Layers:
- Level cakes if needed and brush with simple syrup for extra softness. Stack layers with buttercream, crumb coat with white, then chill before adding a teal-frosted finish to the cake’s sides and top.
- Carving and Creating the Geode:
- Use a serrated knife to carve a wedge out of the cake, making room for your geode masterpiece. Layer with buttercream and press in sugar crystals, using lighter colors in the center for depth, then paint the edge with gold leaf or gold dust for that dazzling graduation shine.
- Final Glam:
- Add more gold accents wherever you fancy, and nestle a graduation topper on the crown—the cake is ready for its moment.
 Save
Save Just as the cake was placed in the center of the party table, conversations faded for that one moment and I realized it wasn’t just the dessert, but a symbol of accomplishment. People came together with smiles and cameras, and the teal geode shimmer marked the start of new journeys—both for the graduate and the baker.
Decorating for Drama
Spending a few extra minutes smoothing the teal buttercream makes all the difference when it’s time to photograph or slice the cake. I found out that little imperfections only add charm, especially when the gold paint catches the light just right.
Getting the Geode Just Right
Mixing teals and blues for the sugar crystals gives a richer, more realistic geode effect. Experimenting with the placement and color gradient lets you make each cake your own—anything from deep turquoise to icy blue works as a base.
Party-Ready Presentation Tricks
Chill the assembled cake before serving so the buttercream sets and the sugar crystals hold their shimmer. Setting the cake on a sturdy stand and surrounding it with fresh flowers or pops of gold makes it look spectacular, even in casual settings.
- Clean your serrated knife between slices for pristine cuts.
- If sugar crystals fall off, gently press them back with a food-safe brush.
- Have extra edible gold handy for touch-ups just before guests arrive.
 Save
Save May the celebration sparkle as much as your cake. Enjoy every slice and every smile—the geode design is a reminder that creativity always matters.
Recipe FAQs
- → How do I color the sugar crystals?
Mix rock sugar crystals with teal gel food coloring, then allow to dry for vibrant geode accents.
- → Can I add other flavors to the cake?
Absolutely. Substitute lemon or almond extract for vanilla to introduce new flavor notes.
- → What tools are needed for geode design?
You’ll need a serrated cake knife, offset spatula, and food-safe paintbrush for precise carving and decorating.
- → How many servings does this cake make?
This cake yields approximately 16 servings, perfect for gatherings or celebrations.
- → Is this dessert vegetarian?
Yes, all the ingredients used are vegetarian. Check sugar and coloring for possible traces of nuts.
- → Can the cake be prepared ahead of time?
You can bake layers and prepare buttercream a day in advance, then assemble and decorate just before serving.